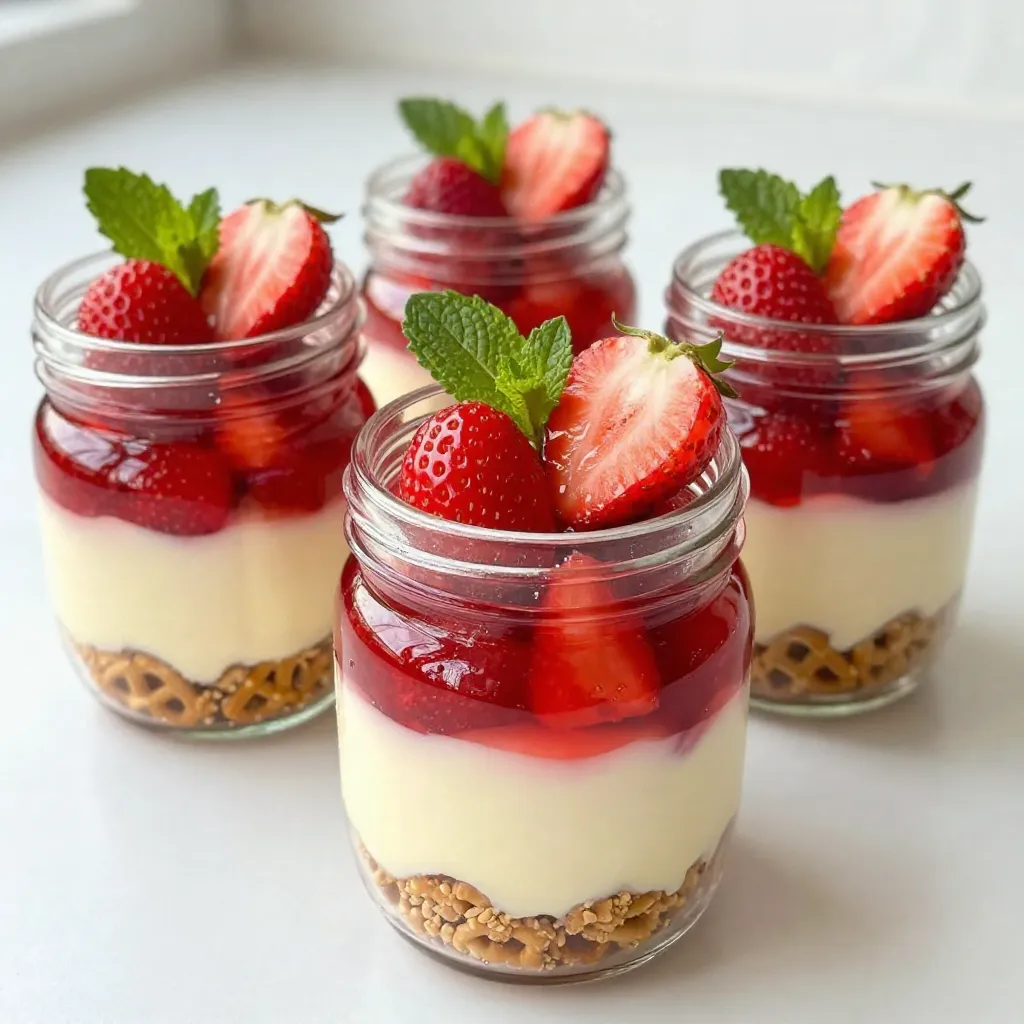
Are you ready to enjoy a sweet and salty treat that dazzles in a jar? Strawberry Pretzel Salad Jars are not only delightful but also super refreshing. With layers of crunchy pretzel crust, creamy cheese, and fruity strawberry goodness, these jars are perfect for any occasion. In this guide, I’ll walk you through each step, share helpful tips, and offer clever variations to make this dish your own. Let’s dive in!
Why I Love This Recipe
- Deliciously Unique Flavor: The combination of sweet strawberries and salty pretzels creates a delightful contrast that is both refreshing and satisfying.
- Perfect for Any Occasion: Whether it’s a picnic, potluck, or family gathering, these strawberry pretzel salad jars are always a hit!
- Easy to Make: This recipe comes together quickly and can be prepared ahead of time, making it convenient for busy days.
- Visually Appealing: Layering the ingredients in jars not only looks stunning but also allows for easy individual servings.
Ingredients
List of Ingredients for Strawberry Pretzel Salad Jars
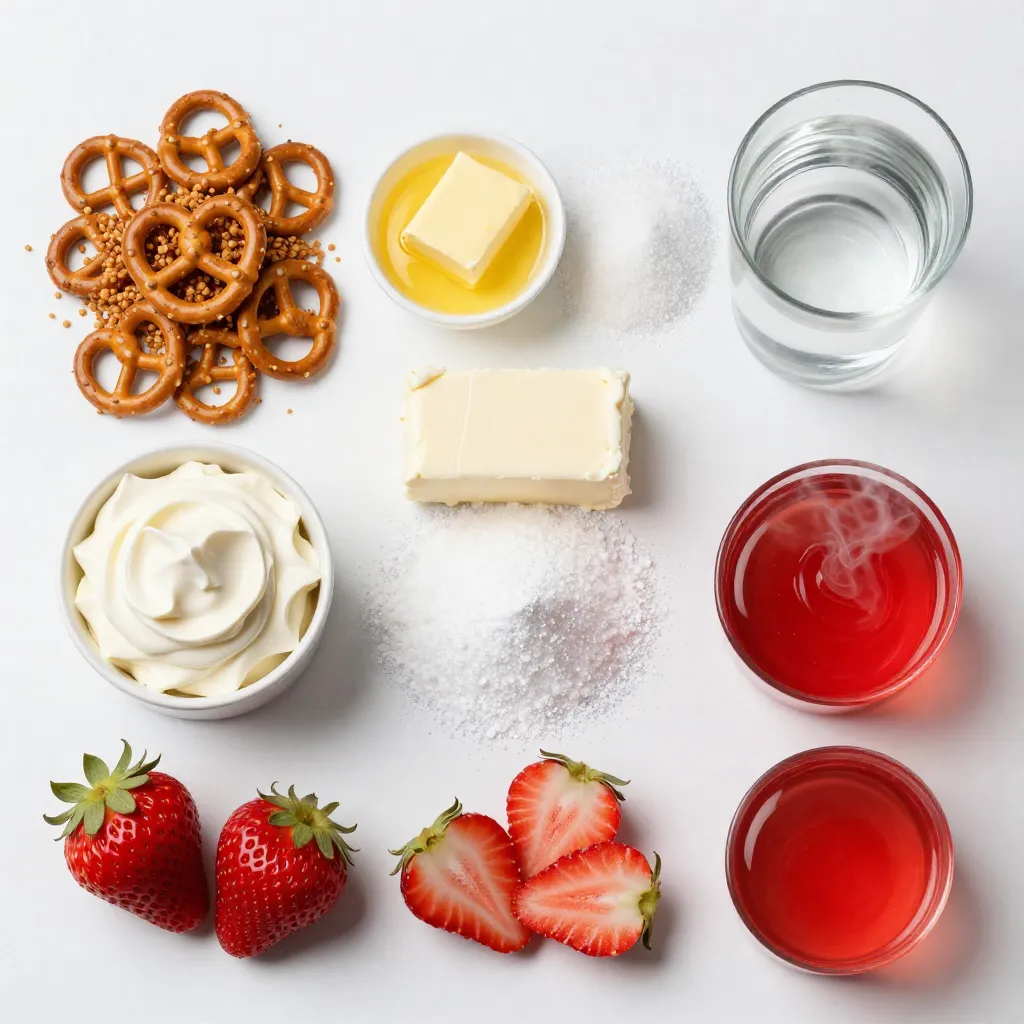
To make these delightful jars, gather the following ingredients:
– 2 cups crushed pretzels
– 1/2 cup unsalted butter, melted
– 1/4 cup sugar
– 8 oz cream cheese, softened
– 1 cup powdered sugar
– 1 cup whipped topping (like Cool Whip)
– 2 cups fresh strawberries, hulled and sliced
– 1/2 cup granulated sugar
– 1 cup strawberry gelatin (Jell-O)
– 2 cups boiling water
Measuring Tips for Accurate Ingredient Quantities
Accurate measurements make a big difference. Here are some tips to help you:
– Use dry measuring cups for dry ingredients like pretzels and sugar.
– Use liquid measuring cups for wet ingredients like melted butter.
– Level off the measuring cup with a flat edge for precision.
– For sticky ingredients like cream cheese, use a spatula to get every bit out.
Suggested Ingredient Substitutions
You can swap some ingredients to fit your taste or diet:
– Use gluten-free pretzels for a gluten-free option.
– Replace cream cheese with a dairy-free cream cheese for a vegan choice.
– Try using fresh blueberries or raspberries in place of strawberries for a twist.
– Substitute whipped topping with homemade whipped cream for a fresher taste.
Step-by-Step Instructions
Prepping the Pretzel Crust
To start, preheat your oven to 350°F (175°C). In a bowl, mix 2 cups of crushed pretzels with 1/2 cup of melted unsalted butter and 1/4 cup of sugar. Stir well until the pretzels are fully coated. Next, spread this pretzel mixture into a greased 9×13-inch baking dish. Bake it for about 10 minutes. Once done, let it cool completely. This crust will add a nice crunch to your jars.
Creating the Cream Cheese Layer
In a separate bowl, beat together 8 oz of softened cream cheese and 1 cup of powdered sugar until smooth. This step is key for a creamy texture. Then, gently fold in 1 cup of whipped topping, like Cool Whip, to keep it light. Spread this cream cheese layer evenly over the cooled pretzel crust. This layer brings a rich and sweet element to the dish.
Preparing the Strawberry Gelatin Topping
Now, let’s make the strawberry topping. Take 2 cups of fresh strawberries, hull and slice them, then mix them with 1/2 cup of granulated sugar. Let them sit for about 10 minutes. This helps the strawberries release their juices. In another bowl, dissolve 1 cup of strawberry gelatin in 2 cups of boiling water. Stir until it’s fully dissolved. After a few minutes, add the macerated strawberries with their juices to the gelatin and mix well. Pour this mixture over the cream cheese layer. Refrigerate for at least 2-4 hours until it sets. This topping adds a fruity burst to every bite.
Tips & Tricks
Secrets to Perfectly Layered Jars
To create stunning layers in your jars, use clear glass. This lets you see each layer. Start with the pretzel crust at the bottom. Make sure it is cool before adding the cream cheese mixture. Spread the cream cheese evenly. Use a spatula for a smooth finish. Next, gently add the strawberry gelatin mix on top. Pour slowly to avoid mixing layers. Finally, top with a fresh strawberry and mint leaf for color.
How to Avoid Common Mistakes
One common mistake is using warm layers. Always cool the pretzel crust completely. If the cream cheese mix is too warm, it will melt into the crust. Another issue is not letting the gelatin set long enough. Refrigerate for at least 2-4 hours. This ensures the layers stay separated. Lastly, don’t rush the maceration of strawberries. Let them sit for at least 10 minutes. This step makes them juicy and flavorful.
Serving Suggestions for Events and Gatherings
These jars are perfect for parties and picnics. They are fun and easy to serve. Set up a dessert table with colorful jars. You can make them ahead of time. Just remember to keep them chilled until serving. Consider pairing them with whipped cream or a scoop of ice cream for extra indulgence. If you want to impress guests, use a mix of different fruits in some jars. This way, you create a variety of flavors.
Pro Tips
- Use Fresh Strawberries: Opt for ripe, fresh strawberries for the best flavor and texture in your salad jars.
- Cool the Gelatin: Allow the gelatin to cool slightly before mixing in the strawberries to prevent them from cooking or becoming mushy.
- Layering Technique: For a visually appealing jar, layer the ingredients carefully and consider using a piping bag for the cream cheese mixture.
- Make Ahead: This dessert is perfect for making ahead of time; it can be prepared a day in advance and stored in the refrigerator until serving.
Variations
Adding Different Fruits to Your Jars
You can make your Strawberry Pretzel Salad Jars even better by adding other fruits. Try using blueberries, raspberries, or diced peaches. These fruits add color and flavor. Just make sure to cut them small. Mix them in with the strawberries or layer them on top. This gives your jars a fun twist. It also makes them more colorful and tasty.
Gluten-Free Version of Strawberry Pretzel Salad
To make a gluten-free version, swap regular pretzels for gluten-free pretzels. Check the label to make sure they are safe. Use the same amount as the recipe calls for. This way, you can enjoy the same great taste without gluten. You can also check for gluten-free whipped toppings and gelatin.
Layering with Other Flavored Gelatins
You can switch up the flavor of the gelatin for a new taste. Instead of strawberry gelatin, try raspberry, peach, or even lemon. Each flavor brings a different vibe to the dish. Just remember to mix the new flavor with the same amount of boiling water. This keeps the texture nice. Layering different gelatins makes your jars look pretty, too!
Storage Info
Best Practices for Storing Strawberry Pretzel Salad Jars
To keep your Strawberry Pretzel Salad Jars fresh, store them in the fridge. Use airtight containers or simply cover the jars tightly. This helps keep the layers intact and prevents drying out. Avoid stacking jars to keep the layers from mixing.
How Long They Last in the Refrigerator
These jars can last up to four days in the refrigerator. After that, the pretzel crust might become soggy. To enjoy the best texture, eat them within this time frame. If you see any changes in color or smell, it’s best to toss them.
Freezing Tips and Tricks
Freezing these jars is not ideal. The cream cheese layer and gelatin do not freeze well. If you must freeze them, do so without the cream cheese layer. You can freeze just the pretzel crust and gelatin separately. When ready to serve, prepare the cream cheese layer fresh. This keeps everything tasting great!
FAQs
Can I make Strawberry Pretzel Salad Jars the night before serving?
Yes, you can make these jars the night before. Just assemble them and chill. This way, the flavors meld nicely. The layers stay fresh and tasty. Plus, it saves you time on the day you serve them.
What can I use instead of Cool Whip?
If you don’t have Cool Whip, you can use homemade whipped cream. Simply whip heavy cream with a bit of sugar. You can also use any store-bought whipped topping. Just ensure it has a similar texture. This keeps your jars light and fluffy.
How do I know when the gelatin is fully set?
To check if the gelatin is set, gently press it with your finger. If it feels firm and holds its shape, it’s ready. You can also look for a wobbly surface. It should not jiggle too much. This means your strawberry layer is good to go!
Can I use frozen strawberries instead of fresh?
Yes, you can use frozen strawberries. Just thaw them first and drain excess liquid. This helps keep your jars from getting too watery. Frozen strawberries work great in this recipe if fresh ones are not available. Enjoy the sweet flavors!
In this post, we explored how to make Strawberry Pretzel Salad Jars from start to finish. We covered the ingredients, step-by-step instructions, useful tips, and even variations you can try. Remember, layering is key for a pretty dessert. Don’t hesitate to play with fruits or flavors to make it your own. With the right storage, your jars will stay fresh for days. Dive into this tasty treat, and enjoy every bit