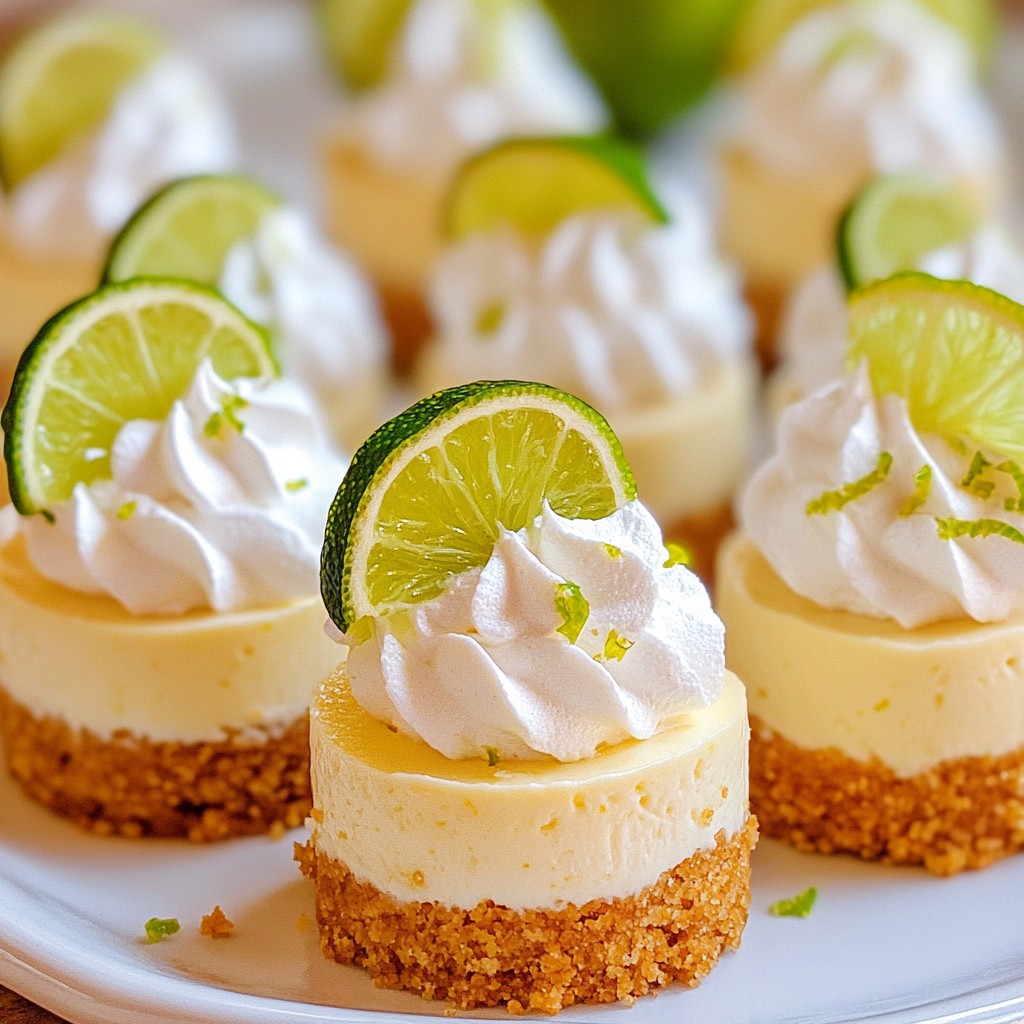
If you crave a sweet treat that’s easy to make, mini key lime cheesecakes are perfect for you! They are delightfully creamy with a refreshing citrus kick. Plus, they’re simple enough for any skill level. In this post, I’ll walk you through the ingredients, step-by-step instructions, and some fun variations. Get ready to impress your friends and family with these bite-sized delights!
Why I Love This Recipe
- Flavorful Delight: These mini cheesecakes capture the perfect balance of sweet and tangy from the key limes, making every bite a refreshing treat.
- Easy to Make: The straightforward steps and simple ingredients allow even novice bakers to create these delicious desserts with ease.
- Perfect Portion Size: Mini cheesecakes are ideal for portion control, letting you enjoy a delightful dessert without overindulging.
- Gorgeous Presentation: The whipped cream and lime slice garnish not only enhance the flavor but also make these cheesecakes visually appealing for any occasion.
Ingredients
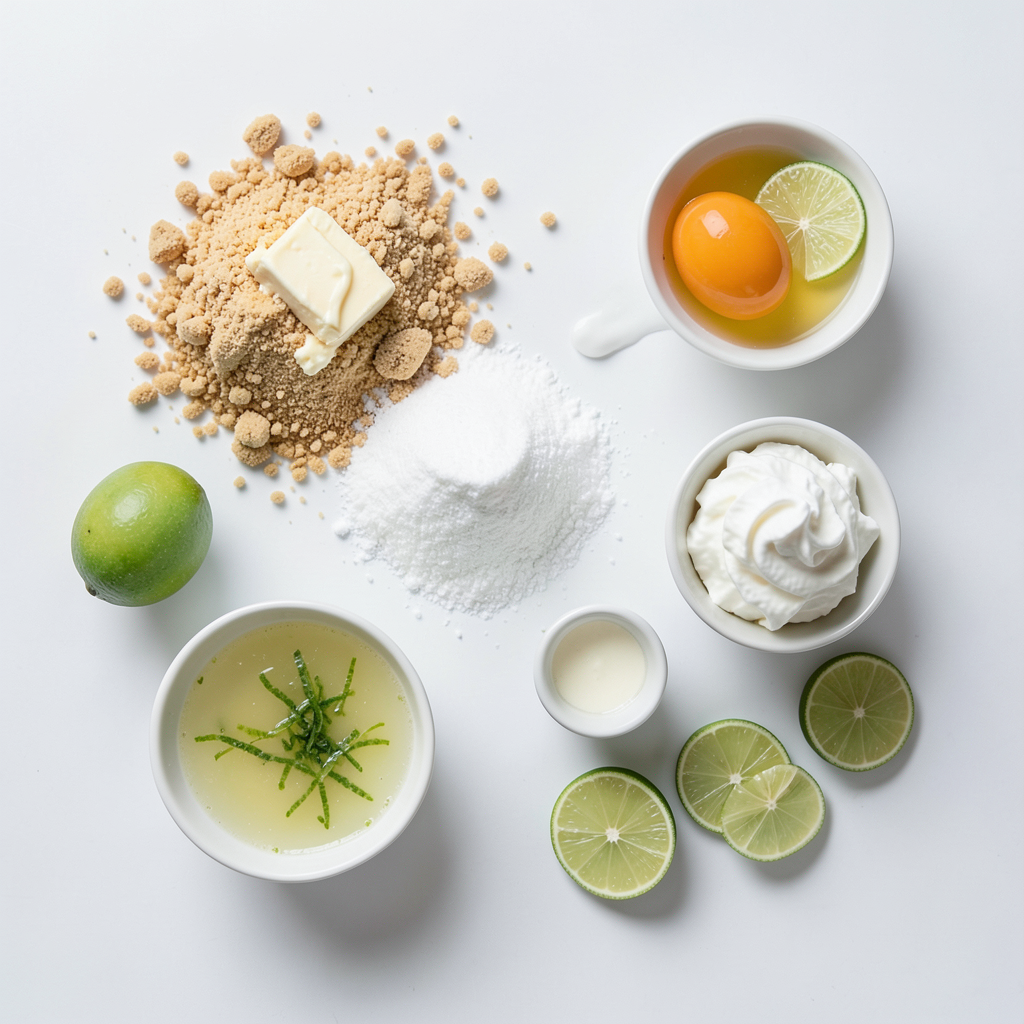
List of Ingredients
- 1 cup graham cracker crumbs
- 1/4 cup unsalted butter, melted
- 2 cups cream cheese, softened
- 1 cup granulated sugar
- 2 large eggs
- 1/4 cup fresh key lime juice
- Zest of 2 key limes
- 1 teaspoon vanilla extract
- Whipped cream for garnish
- Lime slices for garnish
Key Ingredient Highlights
Each ingredient plays a key role in making these mini cheesecakes shine.
- Graham cracker crumbs form a crunchy base. They add a sweet flavor and texture.
- Cream cheese gives the cheesecake its rich, creamy texture. It’s the star of the show.
- Key lime juice offers a bright, tart taste. This juice is what sets these cheesecakes apart.
- Lime zest brings out the key lime flavor. It adds a lovely aroma and color.
Substitutions for Ingredients
You can easily swap some ingredients to fit your needs.
- Graham cracker crumbs: Use crushed cookies like Oreos for a different flavor.
- Cream cheese: Swap it for Greek yogurt for a lighter option.
- Granulated sugar: Replace it with honey or agave for a natural sweetener.
- Fresh key lime juice: Use regular limes if key limes aren't available.
These swaps keep the taste great while adding fun twists!
Step-by-Step Instructions
Preparation Steps
To start, gather your ingredients. You will need graham cracker crumbs, melted butter, cream cheese, sugar, eggs, fresh key lime juice, lime zest, and vanilla extract. First, preheat your oven to 325°F (160°C). This step is key for even baking.
Next, mix the graham cracker crumbs and melted butter in a medium bowl. Stir until the crumbs soak up the butter and form a wet mixture. It should look like wet sand. Take about one tablespoon of this mixture and press it into the bottom of each mini cheesecake cup or muffin tin. Make sure it’s firm to form a solid crust. Bake this crust for just 5 minutes and then take it out to cool.
Baking Process
Now, let's make the cheesecake filling. In a large mixing bowl, begin by beating the softened cream cheese with an electric mixer. Mix until it’s creamy and smooth. This is where the magic happens! Gradually add the granulated sugar while mixing. Keep blending until it’s fully combined.
Add the eggs one at a time, mixing well after each. This helps keep the filling light and fluffy. Next, stir in the fresh key lime juice, lime zest, and vanilla extract. Mix until everything is well blended and looks smooth.
Pour the cheesecake mixture over the cooled crusts in your mini cups. Fill them about three-quarters full. This allows space for the cheesecakes to rise. Bake them in your preheated oven for 15 to 18 minutes. You want the centers to be set but still slightly jiggly.
Cooling and Refrigerating
Once baked, turn off the oven and let the cheesecakes cool inside for 30 minutes. Keep the oven door slightly open. This helps prevent cracks in your cheesecakes. After 30 minutes, take them out and refrigerate for at least 2 hours. This is vital for the texture and flavor to set.
When ready to serve, top each mini cheesecake with a dollop of whipped cream and a slice of lime. Enjoy your delightful mini key lime cheesecakes!
Tips & Tricks
Common Mistakes to Avoid
- Overmixing the batter: This can lead to a dense texture. Mix just until smooth.
- Not cooling the crust: Let the crust cool before adding the cheesecake mix. This helps keep the layers separate.
- Skipping the refrigerating step: Chilling helps set the cheesecake. Don’t rush this part!
- Overbaking: Keep an eye on the time. The centers should be slightly jiggly when done.
How to Achieve the Perfect Texture
To get a creamy texture, use softened cream cheese. Cold cheese can create lumps. Beat it well until smooth before adding sugar. Also, avoid adding too much air by mixing gently. The end goal is a light, fluffy cheesecake that melts in your mouth.
Serving Suggestions
These mini cheesecakes shine with simple toppings. Add a dollop of whipped cream on top right before serving. A slice of lime adds a nice touch. For a fun twist, try adding fresh berries or a drizzle of chocolate sauce. Serve them chilled for the best taste!
Pro Tips
- Use Fresh Lime Juice: For the best flavor, always use freshly squeezed key lime juice instead of bottled juice. Fresh juice has a brighter, more vibrant taste that enhances the cheesecakes.
- Don’t Overmix: When adding the eggs to the cream cheese mixture, mix just until combined. Overmixing can incorporate too much air, leading to cracks in your cheesecakes.
- Cool Gradually: Allow the cheesecakes to cool in the oven before refrigerating. This gradual cooling process helps prevent cracks and ensures a creamy texture.
- Chill Before Serving: For the best flavor and texture, make sure to chill the mini cheesecakes for at least 2 hours. This allows the flavors to meld and the cheesecakes to set up properly.
Variations
Flavor Variations
You can switch up flavors in mini key lime cheesecakes. Try adding coconut for a tropical twist. Just mix in half a cup of shredded coconut with the cream cheese. Raspberry adds a lovely color and taste. Use fresh or frozen raspberries to swirl into the batter. Both flavors pair well with the tangy key lime.
Crust Alternatives
The crust is key to a great cheesecake. While graham crackers are classic, you can use Oreo cookies for a rich, chocolatey base. Just crush the cookies and mix them with melted butter. Almond flour makes a great gluten-free crust. Mix it with melted butter, then press it into the cups for a nutty flavor.
Vegan or Gluten-Free Options
You can make these mini cheesecakes vegan and gluten-free. Use coconut cream instead of cream cheese for a dairy-free option. Swap out eggs for flaxseed meal or applesauce. For gluten-free, use a gluten-free graham cracker or almond flour crust. These options let everyone enjoy this tasty treat without missing out.
Storage Info
How to Store Mini Key Lime Cheesecakes
To keep your mini key lime cheesecakes fresh, place them in an airtight container. Use a container that fits well. This helps them stay moist and tasty. You can store them in the fridge for up to five days. If you want to keep them longer, consider freezing.
Freezing Instructions
To freeze mini key lime cheesecakes, first, let them cool completely. Then, wrap each cheesecake in plastic wrap. Place them in a freezer-safe bag or container. They will stay good in the freezer for up to three months. When you're ready to eat them, thaw them in the fridge overnight.
Shelf Life
Mini key lime cheesecakes last for about five days in the fridge. You may notice slight texture changes after a few days. However, they will still taste great. If frozen, they can maintain quality for three months. Always check for any signs of spoilage before enjoying your treat.
FAQs
Can I Make Mini Key Lime Cheesecakes Ahead of Time?
Yes, you can make mini key lime cheesecakes ahead of time. I often prepare them a day in advance. This gives the flavors more time to blend. Just store them in the fridge. Cover them tightly with plastic wrap. They will stay fresh and tasty until you serve them.
How Do I Know When They Are Done Baking?
To check if your mini key lime cheesecakes are done, look for a slight jiggle in the center. The edges should be set, but the middle can still wiggle a bit. They will firm up as they cool. Baking them for 15 to 18 minutes usually does the trick. Keep an eye on them towards the end of baking.
What Can I Use Instead of Key Limes?
If you can’t find key limes, regular limes work well too. You can also try using lemon juice for a different taste. The flavor will change slightly, but it will still be delicious. Just make sure to use fresh juice for the best results.
This post covered how to make mini key lime cheesecakes. We looked at key ingredients and possible substitutes. You learned step-by-step instructions for prep and baking. I shared tips to avoid common mistakes and how to achieve the perfect texture. We also explored flavor and crust variations, plus storage options.
Remember, baking is about fun and creativity. With these insights, you can make delicious treats that suit your taste. Enjoy your mini cheesecakes and happy baking!