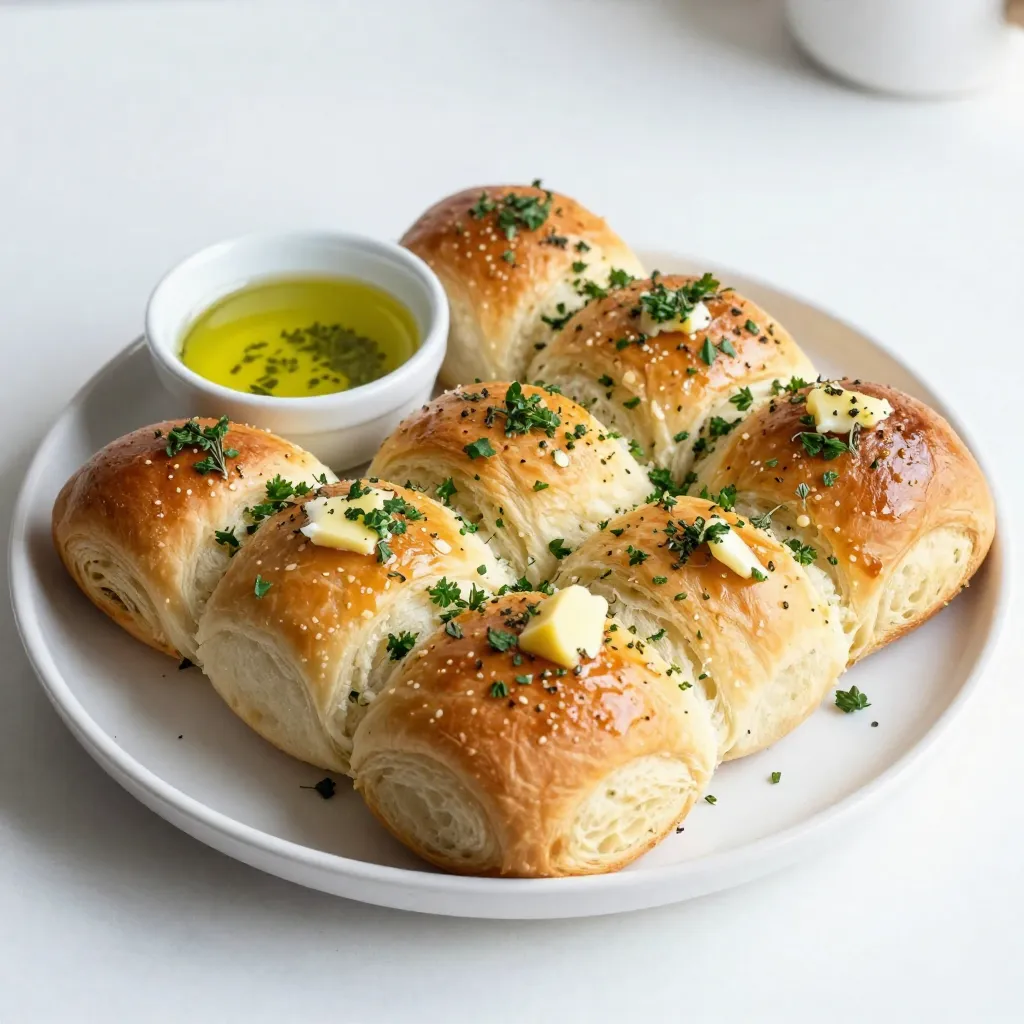
Get ready to tantalize your taste buds with my Herb Garlic Pull-Apart Rolls! This simple recipe combines fresh herbs and rich garlic for a savory treat that’s perfect for any meal. Whether you’re a seasoned baker or just starting, these rolls will impress. Follow my step-by-step guide to create a warm, delightful dish that will have everyone asking for more. Let’s dive into the deliciousness!
Why I Love This Recipe
- Flavorful Garlic Infusion: The combination of fresh herbs and garlic creates a mouthwatering aroma that fills your kitchen and makes these rolls irresistible.
- Pull-Apart Fun: These rolls are not just delicious; they are also fun to eat! Pull them apart for a delightful sharing experience at any meal.
- Versatile Serving Options: Perfect as a side dish, appetizer, or even a snack, these rolls can easily complement any meal or be enjoyed on their own.
- Homemade Comfort: There’s something truly comforting about homemade bread. These rolls are easy to make and will warm your heart and home.
Ingredients
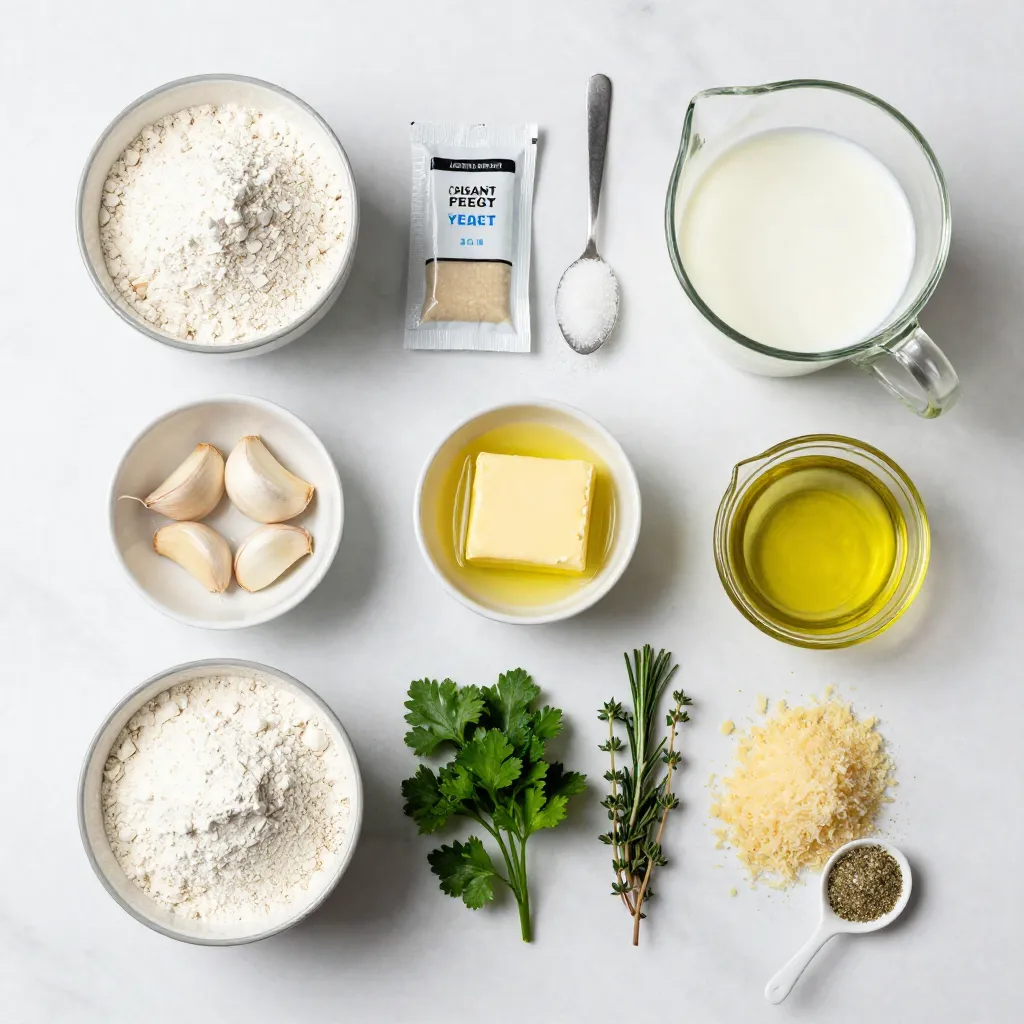
List of Essential Ingredients
– 3 cups all-purpose flour
– 1 packet (2 1/4 tsp) instant yeast
– 1 tablespoon sugar
– 1 teaspoon salt
– 1 cup warm milk (about 110°F or 43°C)
– 2 tablespoons unsalted butter, melted
– 2 tablespoons olive oil
– 4 cloves garlic, minced
– 2 tablespoons fresh parsley, chopped
– 1 tablespoon fresh rosemary, chopped
– 1 tablespoon fresh thyme, chopped
– 1/4 cup grated Parmesan cheese
– 1 tablespoon Italian seasoning
– Extra melted butter for brushing
To create these herb garlic pull-apart rolls, you need simple yet flavorful ingredients. The all-purpose flour gives the rolls their structure. Instant yeast helps the dough rise quickly, giving you fluffy rolls. Sugar and salt balance the flavors.
Warm milk activates the yeast and makes the dough soft. Unsalted butter adds richness, while olive oil enhances moisture. Garlic and fresh herbs bring bold flavors to each bite. Parmesan cheese adds a savory edge, and Italian seasoning ties everything together. Don’t forget the extra melted butter for brushing! It gives your rolls a beautiful, golden finish.
With these ingredients, you can create a delightful treat that is perfect for sharing. Each roll pulls apart easily, revealing a soft, herb-filled center. Enjoy making these rolls and impressing your friends and family!
Step-by-Step Instructions
Preparing the Dough
– Mixing Dry Ingredients
In a large bowl, mix 3 cups of all-purpose flour, 1 packet of instant yeast, 1 tablespoon of sugar, and 1 teaspoon of salt. This mix will give your rolls a great base.
– Adding Wet Ingredients
In another bowl, whisk together 1 cup of warm milk, 2 tablespoons of melted butter, and 2 tablespoons of olive oil. Slowly add this to the dry mix, stirring until a dough forms.
– Kneading the Dough
Knead the dough on a floured surface for about 5 to 7 minutes. You want it smooth and elastic. This step builds the dough’s structure.
First Rise
– Placing the Dough to Rise
Place the kneaded dough in a greased bowl. This prevents sticking and helps it rise.
– Covering and Timing
Cover the bowl with a kitchen towel. Let it rise in a warm spot for about 1 hour. The dough should double in size.
Herb-Garlic Filling Preparation
– Combining Ingredients for Filling
In a small bowl, mix 4 cloves of minced garlic, 2 tablespoons of chopped parsley, 1 tablespoon of chopped rosemary, 1 tablespoon of chopped thyme, 1/4 cup of grated Parmesan cheese, and 1 tablespoon of Italian seasoning. This filling adds a burst of flavor.
– Setting It Aside
Set the herb-garlic filling aside for later. This will be the heart of your rolls.
Shaping the Rolls
– Dividing the Dough
After the first rise, punch down the dough. Divide it into 16 equal pieces. This makes it easy to shape each roll.
– Filling and Sealing Rolls
Flatten each piece slightly. Place a teaspoon of the herb-garlic filling in the center. Fold the dough over the filling, pinch to seal, and roll it into a ball.
Second Rise and Baking
– Arranging in the Baking Dish
Place the balls in a greased bundt pan or round dish. Stack them closely for pull-apart fun.
– Preheating the Oven
Preheat your oven to 350°F (175°C) while the rolls rise again.
– Baking Time and Temperature
Cover the pan with a towel, letting it rise for another 30 minutes. Bake for 25-30 minutes, until golden brown. Enjoy the warm aroma filling your kitchen.
Tips & Tricks
Achieving the Perfect Texture
Kneading Techniques
Kneading helps develop gluten. This makes the rolls soft and chewy. Use your palms to push the dough away. Fold it back and repeat. Do this for 5-7 minutes until the dough is smooth. If it feels sticky, add a little flour.
Importance of Rising Time
Rising time is key to light rolls. Let the dough rise in a warm spot. Cover it with a towel to keep it warm. The dough should double in size in about an hour. This gives the yeast time to work.
Flavor Enhancements
Additional Herbs or Cheeses
You can boost flavor with more herbs. Try adding basil, oregano, or dill. For a cheesy twist, mix in mozzarella or feta. This gives each bite more taste. Experiment with what you love!
Adjusting Seasoning
Taste is important. If you like more flavor, increase the garlic or salt. Add a pinch of red pepper flakes for a kick. Adjust the seasonings to suit your family’s taste buds.
Presentation Tricks
Serving Suggestions
Serve your rolls warm on a wooden board. Place a small bowl of herb-infused olive oil next to them. This adds a nice touch and flavor for dipping.
Garnishing Ideas
Garnish your rolls with fresh herbs. Sprinkle chopped parsley or thyme on top. It looks pretty and adds a fresh taste. You can also drizzle a bit of melted butter on top for extra shine.
Pro Tips
- Use Fresh Herbs: Fresh herbs provide a vibrant flavor that dried herbs can’t match. Make sure to use fresh parsley, rosemary, and thyme for the best taste.
- Check Dough Temperature: The milk should be warm, not hot, to activate the yeast without killing it. Aim for about 110°F (43°C) to create the perfect environment for rising.
- Let Them Rise: Allowing the rolls to rise twice is key to achieving a light and fluffy texture. Don’t rush this step, as it enhances the flavor and texture.
- Brush with Butter: Brushing the rolls with melted butter before and after baking adds richness and helps achieve a beautifully golden crust.
Variations
Cheese-Stuffed Options
You can add cheese to your pull-apart rolls for extra flavor. Popular choices include mozzarella, cheddar, or even feta. Each cheese gives a unique taste and texture. Just be careful with the amount. A bit goes a long way.
When adding cheese, you may need to adjust cooking times. If you use thicker cheese, the rolls might take longer to bake. Start checking for doneness a few minutes early. Look for a golden-brown top and a soft center.
Herb Combinations
You can mix up the herbs in your rolls. Use fresh herbs for a bright flavor or dried herbs for ease. Fresh herbs give a strong taste, while dried herbs are more subtle but still tasty.
Consider seasonal herbs too. In spring, you might use fresh basil or chives. In fall, try sage or dill. These combinations can change the whole vibe of your rolls.
Making Them Vegan
To make these rolls vegan, swap out dairy and eggs easily. Use plant-based milk like almond or oat milk. For butter, try coconut oil or vegan butter.
You can also replace Parmesan cheese with a vegan version or nutritional yeast. This keeps the savory flavor without using animal products. Adjust the ingredients to fit your taste. Enjoy a delicious vegan treat!
Storage Info
Storing Leftover Rolls
– Store leftover rolls in an airtight container.
– Keep them at room temperature for up to two days.
– For longer storage, place them in the fridge. They last about five days.
Reheating Instructions
– Use an oven to reheat for the best taste.
– Preheat the oven to 350°F (175°C).
– Heat for about 10 minutes or until warm.
– If you use a microwave, heat on low for 15-20 seconds.
– Microwaving can make the rolls soft but may lose crispness.
Freezing for Later
– To freeze, wrap each roll in plastic wrap.
– Place them in a freezer bag or container.
– They can be frozen for up to three months.
– To thaw, take them out of the freezer overnight.
– Reheat in the oven for about 10 minutes for best results.
FAQs
Common Questions about Herb Garlic Pull-Apart Rolls
– Can I use active dry yeast instead of instant yeast?
Yes, you can. Just proof it first. Mix it with warm milk and sugar. Wait until it bubbles, then add it to the dry mix.
– How can I make the rolls ahead of time?
You can prepare the dough and let it rise. Then, shape the rolls and store them in the fridge. Bake them the next day after a quick rise.
– What are the best dipping sauces for these rolls?
Olive oil with herbs is great. A garlic butter sauce or marinara also works well. You can even try a creamy ranch dip for something different.
Troubleshooting Common Issues
– Why did my rolls turn out dense?
This often means the dough did not rise properly. Check your yeast’s freshness and ensure your dough rises in a warm space.
– What if my dough doesn’t rise?
If your dough doesn’t rise, it might be too cold. Try placing it near a warm oven or in a sunny spot. If the yeast is old, it may not work.
Nutritional Info
– Caloric Content per Serving
Each roll has about 150 calories. This can vary based on your ingredients and portion size.
– Healthier Ingredient Swaps
Use whole wheat flour for added fiber. Substitute olive oil with avocado oil for healthy fats. You can reduce cheese for fewer calories.
You now have the tools to make the perfect herb garlic pull-apart rolls. We covered essential ingredients, simple steps, and helpful tips to boost flavor. Remember, kneading and rising are key to great texture. You can tailor these rolls to your taste with different herbs or cheeses. Don’t forget the best storage methods to keep leftovers fresh. Baking should be fun, and now you can impress your friends and family with delicious rolls. Enjoy every bite and happy cookin