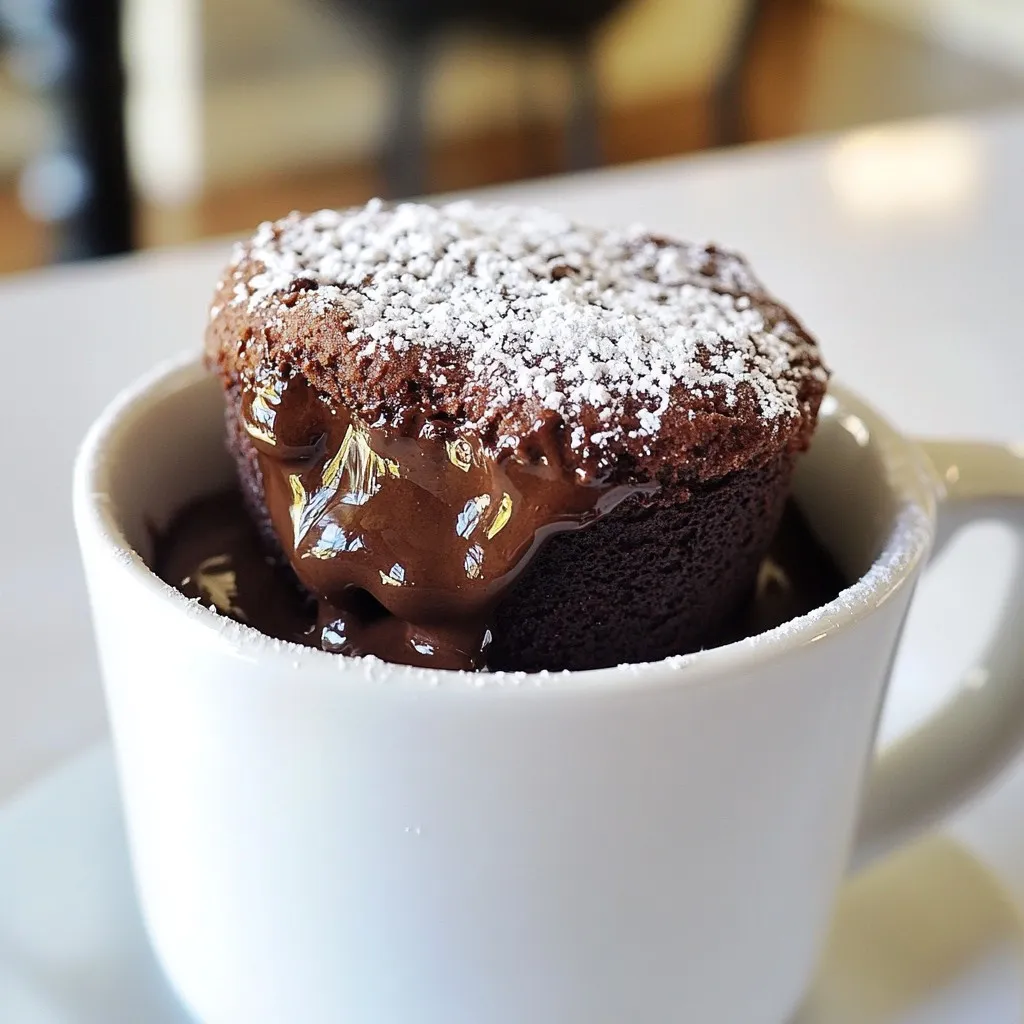
If you crave a quick, sweet treat, the Chocolate Lava Mug Cake is your answer! This simple recipe gives you a rich, gooey dessert in minutes. With just a few basic ingredients, you’ll create a warm cake that flows with chocolate goodness. Ready to impress your taste buds? Dive into this easy step-by-step guide and enjoy a treat that’s as fun to make as it is to eat!
Why I Love This Recipe
- Quick and Easy: This mug cake can be prepared in just 5 minutes, making it the perfect dessert for those late-night cravings.
- Decadent Chocolate Flavor: The rich chocolate flavor combined with the gooey center creates an indulgent treat that satisfies any chocolate lover’s dreams.
- No Messy Baking: With this recipe, you skip the hassle of traditional baking. No mixing bowls or pans required, just a mug!
- Customizable: You can easily add your favorite toppings or mix-ins, like nuts or caramel, to personalize your lava cake experience.
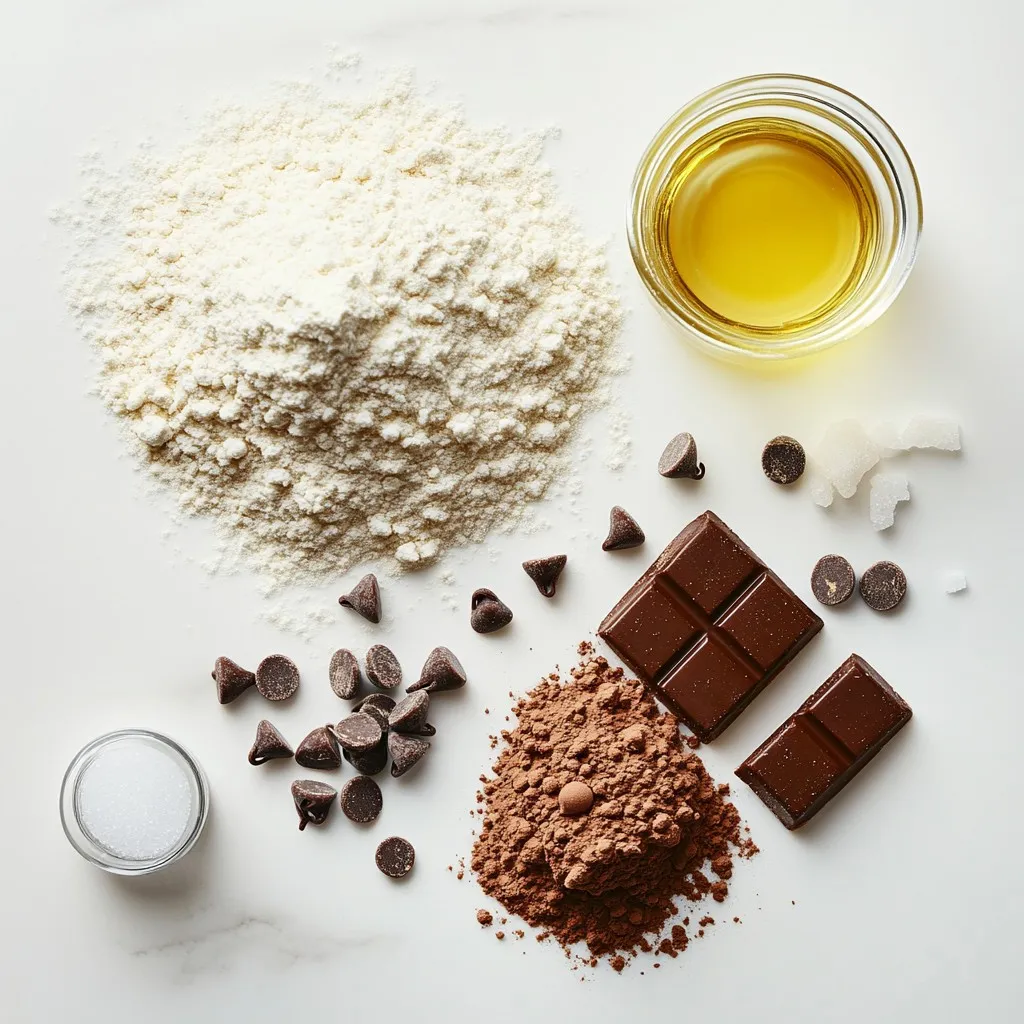
Ingredients
Detailed List of Ingredients
– 1/4 cup all-purpose flour
– 1/4 cup granulated sugar
– 1/4 cup unsweetened cocoa powder
– 1/4 teaspoon baking powder
– 1/8 teaspoon salt
– 3 tablespoons milk
– 2 tablespoons vegetable oil
– 1/4 teaspoon vanilla extract
– 1 chocolate square (or 1 tablespoon chocolate chips)
– Optional: Powdered sugar for dusting
Gathering the right ingredients is key to making a great Chocolate Lava Mug Cake. Each item plays an important role in creating that rich, gooey center.
First, you need all-purpose flour. It gives the cake structure. Granulated sugar adds sweetness and helps it rise. Unsweetened cocoa powder brings a deep chocolate flavor. Baking powder helps the cake puff up in the microwave. A pinch of salt balances the sweetness.
Next, you will add milk, which keeps the cake moist. Vegetable oil makes it tender. Vanilla extract adds a warm note to the flavor. The star of the show is the chocolate square or chips. This is what creates that luscious lava effect when melted.
If you want to impress, you can sprinkle powdered sugar on top. It adds a nice touch and looks beautiful. Each ingredient is simple, but together they make something amazing. You will love how easy it is to create this treat with just a few items from your kitchen.
Step-by-Step Instructions
Preparing the Dry Ingredients
First, grab a microwave-safe mug. Add 1/4 cup of all-purpose flour. Then, mix in 1/4 cup of granulated sugar. Next, add 1/4 cup of unsweetened cocoa powder. Sprinkle in 1/4 teaspoon of baking powder and 1/8 teaspoon of salt. Use a fork to blend these dry ingredients well. This step ensures that each bite is sweet and chocolatey.
Combining Wet Ingredients
Now, let’s add the wet stuff. Pour in 3 tablespoons of milk. Add 2 tablespoons of vegetable oil. Finally, include 1/4 teaspoon of vanilla extract. Stir until the batter is smooth and combined. This makes your cake soft and tasty.
Creating the Lava Center
Take a chocolate square or 1 tablespoon of chocolate chips. Gently push it into the center of your batter. Make sure it is mostly submerged. This placement is key for that gooey lava center we all love.
Cooking the Mug Cake
Microwave your mug on high for about 40-60 seconds. Start checking at 40 seconds. The edges should feel firm while the center remains soft and gooey. Be careful not to overcook it. This keeps the lava effect alive and delicious.
Final Touch
Let your cake cool for about a minute. If you want, dust it lightly with powdered sugar. This adds a nice touch and makes it look fancy. Now, your chocolate lava mug cake is ready to enjoy!
Tips & Tricks
Ensuring the Perfect Lava Flow
To get that gooey center, avoid overcooking. Start with just 40 seconds in the microwave. Check for a soft middle; it should not be firm. If you cook too long, the lava effect fades. Use good chocolate for melting. I recommend a rich dark chocolate or high-quality chocolate chips. These melt beautifully and enhance the flavor.
Mug Selection
Choose a microwave-safe mug. It should not be too small; a standard coffee mug works best. The mug should hold about 1 cup of batter. This helps the cake cook evenly. Make sure it is sturdy, so it doesn’t crack in the heat.
Quick Cleanup Suggestions
Cleaning up can be easy! Use a paper towel to wipe out the mug. It helps to reduce the mess. Rinse the mug quickly after use. A little soap and warm water will do the trick. For utensils, mix in the mug to limit dishes. This makes it simple and fast!
Pro Tips
- Use Quality Chocolate: The choice of chocolate affects the lava effect and flavor. Opt for high-quality chocolate for a richer taste.
- Adjust Cooking Time: Microwaves vary in power. Keep a close eye on the cake as it cooks to achieve the perfect gooey center without overcooking.
- Experiment with Flavors: Add a pinch of espresso powder or a dash of peppermint extract to the batter for a unique twist on the classic chocolate flavor.
- Pair with Ice Cream: Serve your lava mug cake with a scoop of vanilla ice cream for an indulgent dessert experience.
Variations
Flavor Additions
You can make your chocolate lava mug cake even better! Add nut butters like peanut or almond for a rich taste. A spoonful of flavored extract, like almond or mint, can bring a new twist.
Switch up the chocolate, too! Use dark chocolate for a bold flavor. Milk chocolate gives a sweet touch, and white chocolate offers creaminess. Each type creates a unique treat.
Dietary Substitutions
If you need a gluten-free option, swap all-purpose flour for almond or coconut flour. These flours work well and still taste great!
For a vegan version, replace milk with almond or oat milk. Use a plant-based oil like coconut oil instead of vegetable oil. You can still enjoy a delicious dessert without dairy or eggs!
Adding Toppings
Toppings can make your mug cake even more special. Try adding a scoop of ice cream on top for a cold contrast. Whipped cream adds a light, fluffy texture. Fresh berries like strawberries or raspberries can brighten the dish.
You can also drizzle sauces over your cake. Caramel sauce adds sweetness, while fudge sauce gives extra chocolatey goodness. These toppings enhance flavor and presentation, making your dessert irresistible!
Storage Info
Best Practices for Leftovers
If you have leftover mug cake, store it in an airtight container. This keeps it fresh longer. The mug cake will last about one day at room temperature. If you want to keep it longer, refrigerate it. It can last up to three days in the fridge. Remember, ingredients like milk and chocolate do not last long.
Reheating Instructions
To reheat your mug cake, use the microwave. Place the mug in the microwave for about 10 to 15 seconds. Check if it’s warm enough. If not, heat it a few more seconds. This helps revive its gooey center. Avoid overcooking, or it will lose the lava effect. Enjoy it warm to bring back the rich flavors!
FAQs
Can I make Chocolate Lava Mug Cake without a microwave?
Yes, you can bake this mug cake in the oven. Preheat your oven to 350°F (175°C). Use a ramekin instead of a mug. Follow the same mixing steps. Pour the batter into the ramekin. Bake for about 10-12 minutes. Check for that gooey center. The cake should be firm around the edges but soft in the middle.
How can I make multiple servings?
To make more servings, simply multiply the ingredients. For two servings, use:
– 1/2 cup all-purpose flour
– 1/2 cup granulated sugar
– 1/2 cup unsweetened cocoa powder
– 1/2 teaspoon baking powder
– 1/4 teaspoon salt
– 6 tablespoons milk
– 4 tablespoons vegetable oil
– 1/2 teaspoon vanilla extract
– 2 chocolate squares (or 2 tablespoons chocolate chips)
Mix the ingredients in a larger bowl and divide the batter into separate mugs or ramekins. Adjust the cooking time as needed.
What type of cocoa powder should I use?
You can use either natural or Dutch-processed cocoa powder. Natural cocoa is lighter and more acidic. Dutch-processed cocoa is darker and smoother. For a rich flavor, I recommend using Dutch-processed cocoa. It gives a deeper chocolate taste and works well in this recipe. Always check the label for quality.
This blog post showed you how to make a delicious Chocolate Lava Mug Cake. You learned about the key ingredients, how to mix them, and create a gooey center. We covered tips for perfecting the lava flow and quick cleanup. You now have ideas for fun variations and how to store leftovers.
Enjoy your tasty mug cake and share it with friends! It’s a fun treat that’s easy to mak