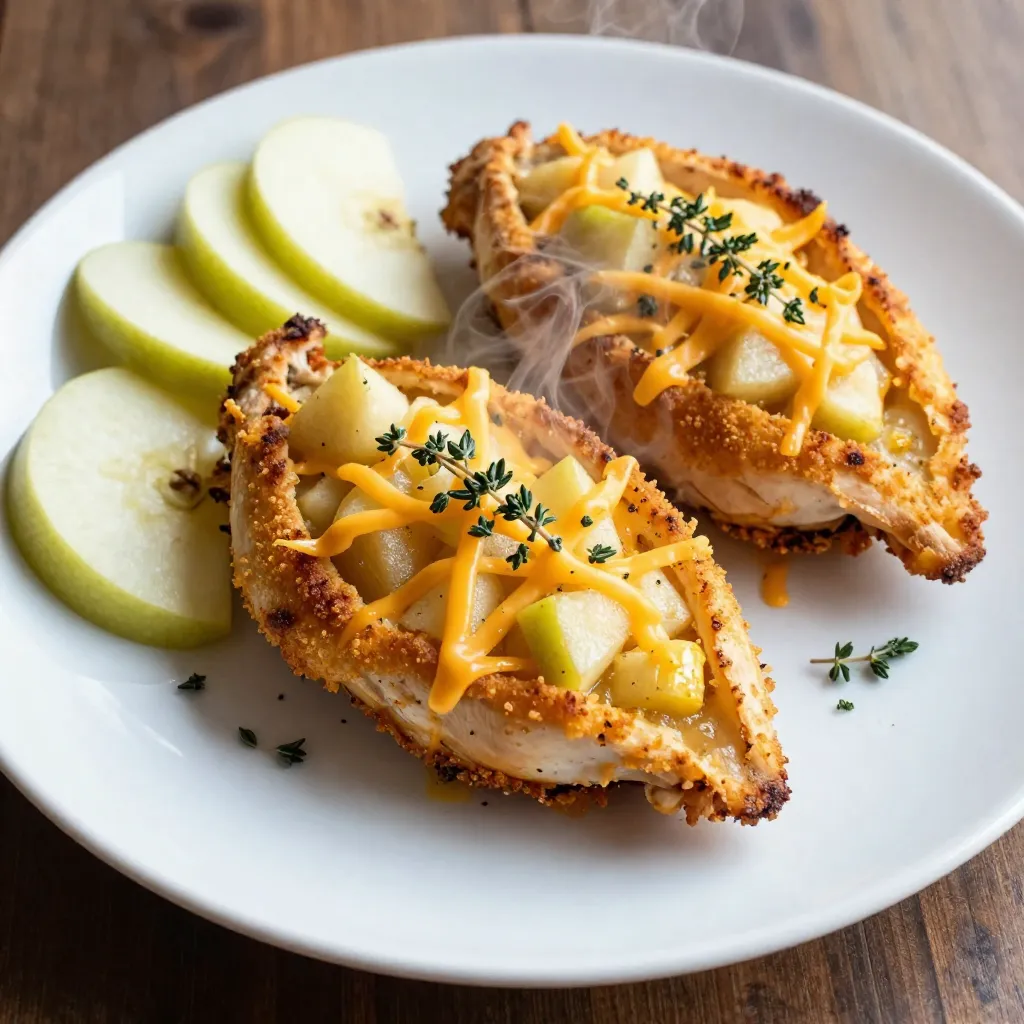
Ready for a meal that’s both savory and simple? Let me introduce you to Apple Cheddar Stuffed Chicken! This dish combines juicy chicken with the sweet crunch of apples and sharp cheddar for a flavor boost. Whether you’re an expert cook or a novice, I’ll walk you through every step, making it easy to impress your family or friends. Let’s dive into the delicious details!
Why I Love This Recipe
- Flavor Combination: The sweet and tart apples perfectly complement the sharp cheddar, creating a savory yet refreshing dish.
- Easy to Prepare: This recipe is straightforward and can be made in under an hour, making it perfect for busy weeknights.
- Healthy Option: Using lean chicken breasts and fresh ingredients makes this a nutritious choice for any meal.
- Impressive Presentation: Stuffed chicken looks elegant on the plate, making it a great dish for entertaining guests.
Ingredients
Comprehensive list of ingredients needed
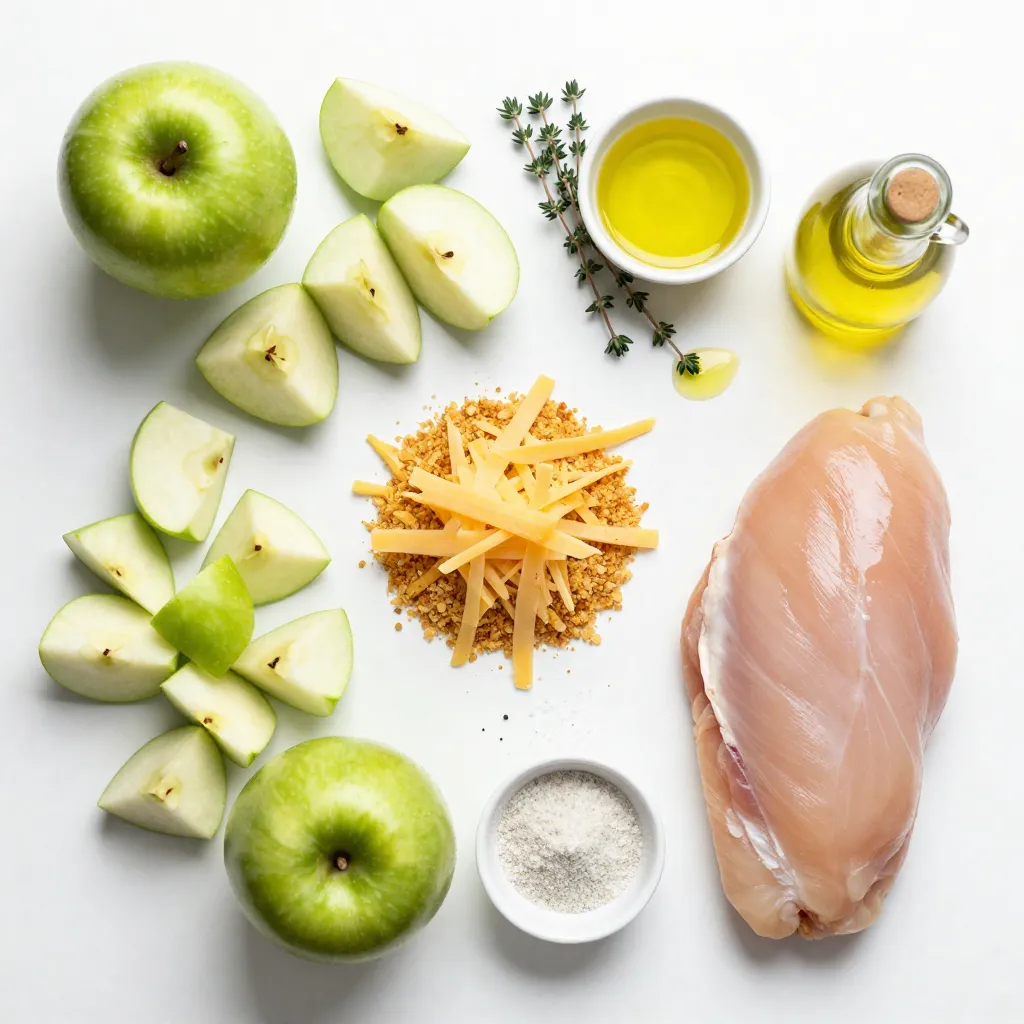
To make Apple Cheddar Stuffed Chicken, you will need:
– 4 boneless, skinless chicken breasts
– 1 large apple (Granny Smith or Honeycrisp), cored and diced
– 1 cup sharp cheddar cheese, shredded
– ½ cup breadcrumbs
– 2 tablespoons fresh thyme, chopped
– 1 tablespoon olive oil
– Salt and pepper to taste
– 1 teaspoon garlic powder
– ½ teaspoon onion powder
Ingredient substitutions and tips
You can swap the apple for a different fruit, like pear or peach. If you want a milder cheese, use Monterey Jack instead of cheddar. Gluten-free breadcrumbs work well for those avoiding gluten. Fresh thyme adds great flavor, but dried thyme can work too. Adjust spices to fit your taste.
Recommended brands or quality of ingredients
For chicken, look for antibiotic-free or organic options. They taste better and are healthier. I prefer using Cabot or Tillamook for cheddar cheese since they offer rich flavors. For olive oil, choose extra virgin for the best quality. Always check the labels for freshness and quality.
Step-by-Step Instructions
Preparing the apple and cheese filling
To start, grab a medium bowl. In it, combine the diced apple and shredded cheddar cheese. You can use Granny Smith or Honeycrisp apples for a great taste. Next, add the breadcrumbs, chopped thyme, garlic powder, onion powder, and a pinch of salt and pepper. Mix well until everything is blended. This filling brings sweet and savory flavors to your chicken.
How to correctly slice the chicken breasts
Now, take each chicken breast and place it on a cutting board. Use a sharp knife to carefully slice a pocket into each breast. Make sure you do not cut all the way through. You want the chicken to hold the filling inside. Once sliced, season both sides with salt, pepper, and a drizzle of olive oil. This adds flavor and keeps the chicken moist.
Searing the chicken breasts
Heat a large skillet over medium heat and add a splash of olive oil. When the oil is hot, place the stuffed chicken breasts in the skillet. Cook each side for about 3-4 minutes. You want a nice golden brown color. This step locks in the flavors and gives the chicken a lovely crust. After searing, transfer the chicken to a baking dish to finish cooking in the oven.
Tips & Tricks
How to ensure chicken is juicy and tender
To keep your chicken juicy, start with fresh, high-quality breasts. Choose boneless, skinless chicken. Rinse them and pat them dry with a paper towel. Season both sides with salt, pepper, and a splash of olive oil. This adds moisture. Searing the chicken helps lock in juices. Cook it on medium heat for a few minutes on each side until golden brown. Baking the chicken ensures it cooks evenly. Remember, chicken should reach 165°F internally for safety.
Ways to enhance flavor with additional spices
You can boost the flavor of your dish easily. Consider adding smoked paprika for a hint of warmth. A pinch of cayenne can add a little heat. If you enjoy fresh herbs, try adding basil or dill to your stuffing mix. You can also mix in a dash of mustard powder for a tangy kick. Experiment with spices to make the dish your own!
Recommended cooking techniques for best results
Searing your chicken before baking is key for great taste. Use a cast-iron skillet if possible. This helps create a nice crust. Once seared, transfer the chicken to a baking dish. Bake at 375°F for 20-25 minutes. This method keeps the chicken flavorful and moist. For even better results, let it rest for a few minutes after baking. This allows the juices to redistribute, making each bite tender and juicy.
Pro Tips
- Choose the Right Apple: Opt for tart apples like Granny Smith or Honeycrisp for a perfect balance with the sharp cheddar.
- Secure Your Stuffing: Use toothpicks to secure the openings of the chicken breasts, preventing the delicious stuffing from spilling out during cooking.
- Don’t Skip the Searing: Searing the chicken before baking helps to lock in moisture and adds a beautiful golden crust.
- Let It Rest: Allow the stuffed chicken to rest for a few minutes after baking; this helps the juices redistribute for juicier chicken.
Variations
Alternative cheeses for stuffing
You can swap sharp cheddar for other cheeses. Try gouda, mozzarella, or feta. Each cheese gives a unique flavor. Gouda adds a creamy touch, while mozzarella melts beautifully. Feta brings a tangy twist that pairs well with apples.
Different fruits to incorporate
While apples shine in this dish, feel free to explore other fruits. Pears work well, adding sweetness and a hint of spice. Cherries can bring a tart kick, while figs offer a rich, earthy flavor. Experiment with your favorite fruits to find new tastes.
Modifications for dietary restrictions
If you need a gluten-free option, use gluten-free breadcrumbs. Many brands offer great alternatives that work well in this recipe. For dairy-free, try vegan cheese. It melts nicely and keeps the stuffing creamy. Always check labels to ensure they fit your needs.
Storage Info
Best practices for storing leftovers
To keep your Apple Cheddar Stuffed Chicken fresh, let it cool first. Place the chicken in an airtight container. You can slice it or store it whole. Keep it in the fridge for up to three days. Always label the container with the date. This helps you remember when you made it.
Reheating tips to maintain flavor and texture
When reheating, use the oven for the best results. Preheat the oven to 350°F (175°C). Place the chicken on a baking tray. Add a splash of water or broth to keep it moist. Cover with foil to prevent drying out. Heat for about 15-20 minutes. Check that it reaches 165°F (74°C) before eating.
Freezer guidelines for stuffed chicken
If you want to store it longer, freezing is a good option. Wrap each chicken breast tightly in plastic wrap. Then, place them in a freezer bag. Remove as much air as possible. Label the bag with the date. You can freeze the stuffed chicken for up to three months. To thaw, move it to the fridge overnight. This keeps the texture nice when you cook it again.
FAQs
How long does it take to cook Apple Cheddar Stuffed Chicken?
It takes about 50 minutes to cook Apple Cheddar Stuffed Chicken. This includes 15 minutes of prep time and 35 minutes of cooking time. First, you sear the chicken for 6 to 8 minutes. Then, bake it for 20 to 25 minutes. Always check if the chicken reaches 165°F for safety.
Can I prepare Apple Cheddar Stuffed Chicken ahead of time?
Yes, you can prepare Apple Cheddar Stuffed Chicken ahead of time. You can stuff the chicken and keep it in the fridge for up to 24 hours. Just remember to cover it tightly. When ready to cook, bring it to room temperature. This helps it cook evenly.
What to serve with Apple Cheddar Stuffed Chicken?
Apple Cheddar Stuffed Chicken pairs well with several sides. You can serve it with a light salad for freshness. Steamed vegetables like broccoli or green beans also work well. For a heartier dish, try mashed potatoes or rice. Each adds a nice balance to the meal.
This blog post covered all you need to know about Apple Cheddar Stuffed Chicken. We discussed the ingredients, their quality, and possible substitutes. You learned step-by-step instructions for preparing and cooking the chicken. I shared tips for juicy chicken and ways to tweak the recipe for your taste. Finally, I explained how to store leftovers and answered common questions.
Overall, this dish is tasty and flexible. I hope you feel ready to cook it and impress everyone at your tabl